laravel 的 redis 队列
laravel 的 redis 队列
概述
在Web开发中,我们经常会遇到需要批量处理任务的场景,比如群发邮件、秒杀资格获取等,我们将这些耗时或者高并发的操作放到队列中异步执行可以有效缓解系统压力、提高系统响应速度和负载能力。
配置文件
.evn文件修改部分QUEUE_CONNECTION=redis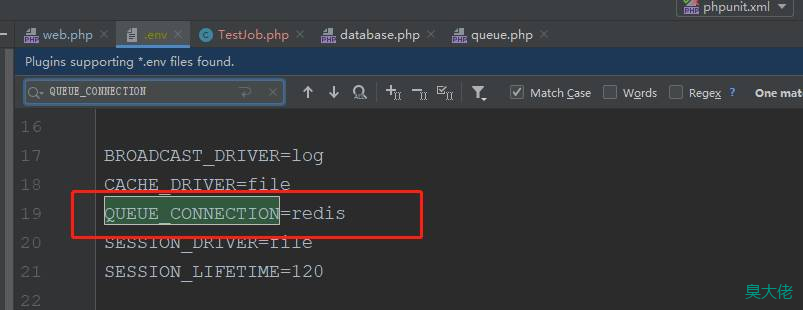
config/database.php 配置文件中配置一个 redis 数据库连接。
数据库
要使用 database 队列驱动,你需要数据表保存任务信息)。要生成创建这些表的迁移,可以在项目目录下运行 Artisan 命令 queue:table,迁移被创建之后,可以使用 migrate 命令生成这些表:
php artisan queue:table

php artisan migrate


创建任务
运行php artisan make:job TestJob,生成一个测试任务,我们以操作友情链接作为演示。
php artisan make:job TestJob

TestJob.php代码如下:
<?php

namespace App\Jobs;

use App\Models\FriendLink;
use Illuminate\Bus\Queueable;
use Illuminate\Queue\SerializesModels;
use Illuminate\Queue\InteractsWithQueue;
use Illuminate\Contracts\Queue\ShouldQueue;
use Illuminate\Foundation\Bus\Dispatchable;
use Illuminate\Support\Facades\Log;

class TestJob implements ShouldQueue
{
    use Dispatchable, InteractsWithQueue, Queueable, SerializesModels;

    protected $friendLink = null;

    /**
     * Create a new job instance.
     *
     * @return void
     */
    public function __construct(FriendLink $friendLink)
    {
        //
        $this->friendLink = $friendLink;
    }

    /**
     * Execute the job.
     *
     * @return void
     */
    public function handle()
    {
        if ($this->friendLink->id = 4) {
            $this->friendLink->name = '悦';
            $this->friendLink->save();
            Log::info('执行队列成功');
        }else{
            Log::info('执行队列失败');
        }
    }
}
再写一个入队列的功能,因为是演示,这里直接在routes/web.php里面写一个,通过url访问就可以实现入列,
Route::get('test', function () {
    $link = \App\Models\FriendLink::query()->find(4);
    \App\Jobs\TestJob::dispatch($link);
});
运行队列
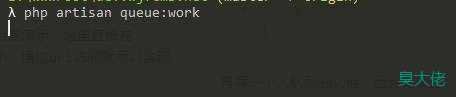
在本地先测试一下
php artisan queue:work
先查看数据库原数据的状态,
原数据name字段的值为“悦遇”,我们访问test路由查看是否有改变。
结果


配置 Supervisor
Supervisor 是 Linux 系统中常用的进程守护程序。如果队列进程 queue:work 意外关闭,它会自动重启启动队列进程。在 Ubuntu 安装Supervisor 非常简单:
sudo apt-get install supervisor

Supervisor 操作
当成功创建配置文件后,需要刷新 Supervisor 的配置信息并使用如下命令启动进程:
启动
sudo supervisord -c /etc/supervisor/supervisord.conf
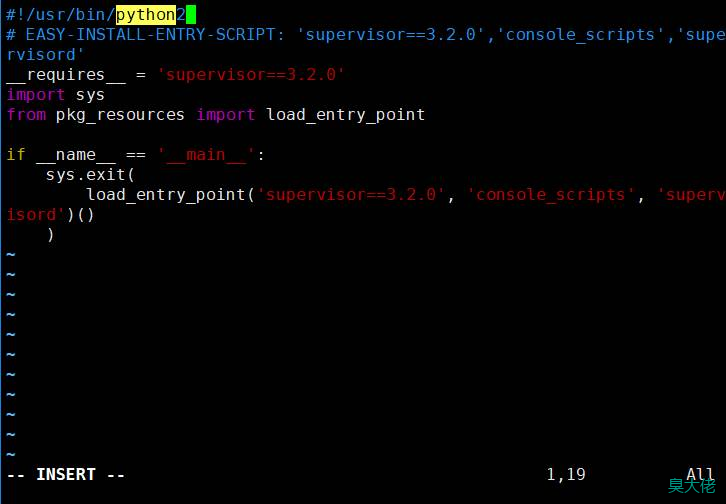
如果出现如下错误: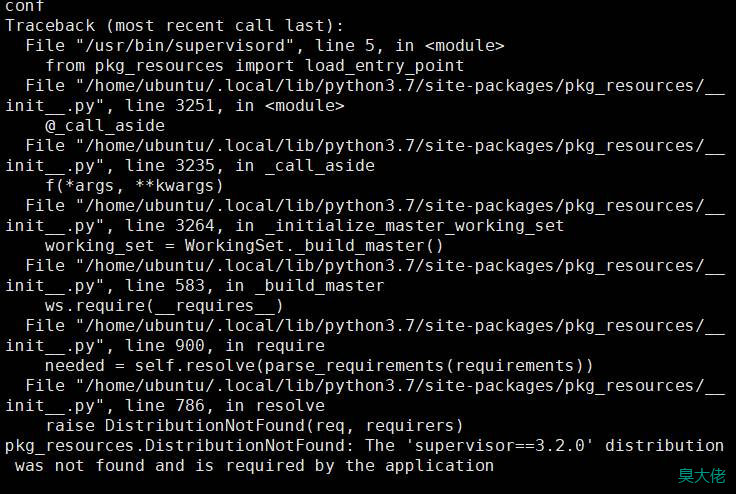
这是python版本引起的,编辑/usr/bin/supervisord将#!/usr/bin/python修改为#!/usr/bin/python2即可。
查看是否已启动
ps -ef|grep supervisord

配置 laravel-worker
Supervisor 配置文件通常存放在 /etc/supervisor/conf.d 目录,在该目录下,可以创建多个配置文件指示 Supervisor 如何监视进程,例如,让我们创建一个开启并监视 queue:work 进程的 laravel-worker.conf 文件:
[program:laravel-worker]
process_name=%(program_name)s_%(process_num)02d ;
command = php /www/wwwroot/xxx/artisan queue:work --daemon;启动命令
autostart = true ; 在 supervisord 启动的时候也自动启动
startsecs = 5 ; 启动 5 秒后没有异常退出,就当作已经正常启动了
autorestart = true ; 程序异常退出后自动重启
startretries = 3 ; 启动失败自动重试次数,默认是 3
user = ubuntu ; 用哪个用户启动
redirect_stderr = true ; 把 stderr 重定向到 stdout,默认 false
stdout_logfile_maxbytes = 20MB ; stdout 日志文件大小,默认 50MB
stdout_logfile_backups = 20 ; stdout 日志文件备份数
; stdout 日志文件,需要注意当指定目录不存在时无法正常启动,所以需要手动创建目录(supervisord 会自动创建日志文件)
stdout_logfile = /www/wwwroot/xxx/storage/app/public/worker.log
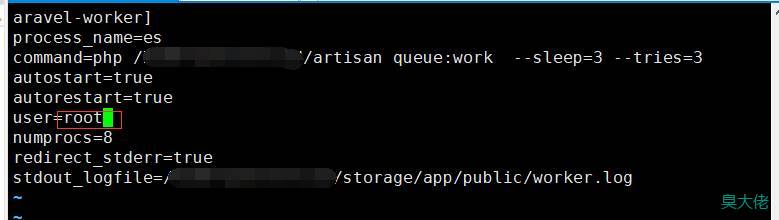
简化版,复制下面的代码,修改代码中三个xxx的地方就可以用了,command= php /xxx/artisan queue:work redis --sleep=3 --tries=3 --daemon``和stdout_logfile=/xxx/storage/app/public/worker.log中的xxx代表网站根目录user=xxx的xxx代表运行用户
[program:laravel-worker]
process_name=%(program_name)s_%(process_num)02d
command= php /xxx/artisan queue:work redis --sleep=3 --tries=3 --daemon
autostart=true
autorestart=true
user=xxx
numprocs=8
redirect_stderr=true
stdout_logfile=/xxx/storage/app/public/worker.log
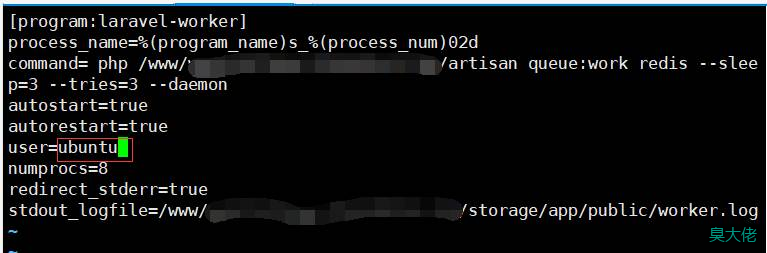
在本例中,numprocs 指令让 Supervisor 运行 8 个 queue:work 进程并监视它们,如果失败的话自动重启。当然,你需要修改 queue:work sqs 的 command 指令来映射你的队列连接。
命令
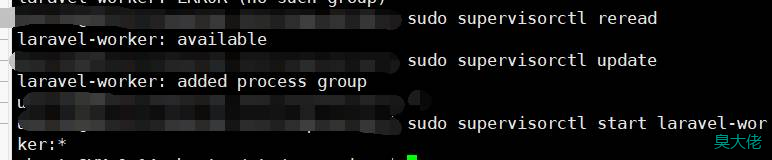
更新 Supervisor 配置并启动进程
sudo supervisorctl reread
sudo supervisorctl update
sudo supervisorctl start laravel-worker:*
以下是常用命令
#读取有更新(增加)的配置文件,不会启动新添加的程序
supervisorctl reread
#重启配置文件修改过的程序
supervisorctl update
#查看程序状态
supervisorctl status
#启动程序 App_name
supervisorctl start App_name
#关闭程序 App_name
supervisorctl stop App_name
#重启程序 App_name
supervisorctl restart App_name
使用top 或者ps aux | grep php 命令可以看到启动的php进程。
你可以通过 Supervisor 官方文档获取更多信息。
测试
查看数据库数据状态

运行
查看数据库

大功告成!
Horizon 队列管理工具
Horizon 提供了一个漂亮的仪表盘,并且可以通过代码配置你的 Laravel Redis 队列,同时它允许你轻易的监控你的队列系统中诸如任务吞吐量,运行时间和失败任务等关键指标。
安装
composer require laravel/horizon
使用
安装完成后,可以在浏览器中这样访问:http://xxx/horizon/
CentOS 下配置
在centOS下,发现我的Supervisor配置在etc目录下

查看配置文件

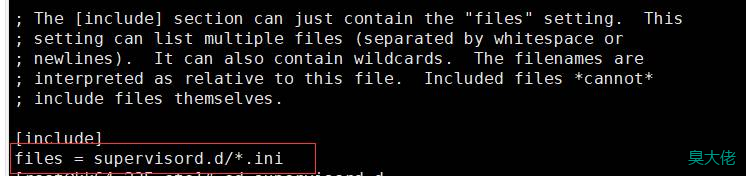
发现它的配置是引入.ini的,我们修改一下
[include]
files = supervisord.d/*.conf
然后修改 laravel-work 配置
运行
supervisorctl reread
supervisorctl update
supervisorctl start laravel-worker:*
运行发现报错

运行以下命令
/usr/bin/python2 /usr/bin/supervisord -c /etc/supervisord.conf
再次运行以上三条命令

监听状态
supervisorctl status
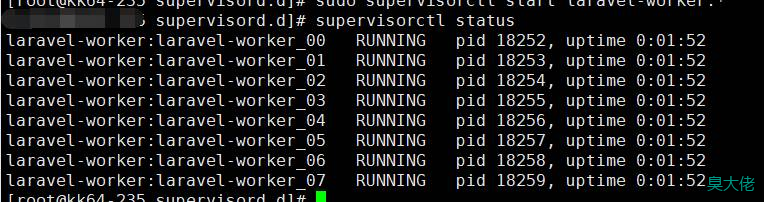
OK!
本文链接:https://www.choudalao.com/article/151
转载请注明来源,感谢尊重原创内容。
留言评论
支持表情、回复和点赞。评论需要先登录。